Unity is a great tool for writing games, and especially so if you are just prototyping some new idea. However, Unity is not only great for games, but works for many other applications as well. Making plans for a new home, I’ve discovered that Unity, together with ProBuilder, is quite useful for sketching floorplans in 3D. The results are quite presentable and offer a first impression on how your future home might look like with your current plans.
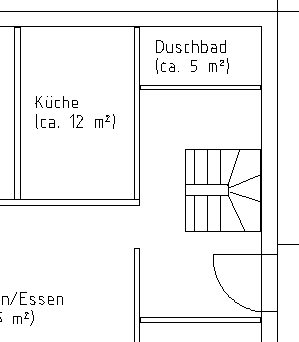
The basis of designing a house and any discussion with your construction company is a floor plan. But imagining how the house will look like from a 2D plan requires quite some imagination. There are many architectural design tools out there, but only very few of them are free of charge. And the free ones usually only offer some basic functionality.
Unity is no 3D modeling tool, and as this, it offers very few tools for modeling a 3D environment on its own. If you are familiar with Blender or any other 3D modeling tool, they are surely more efficient for creating a building. However, the strength of Unity is its extensibility. And of course, there is an asset in the asset store which turns Unity into a modeling tool.
The ProBuilder Asset
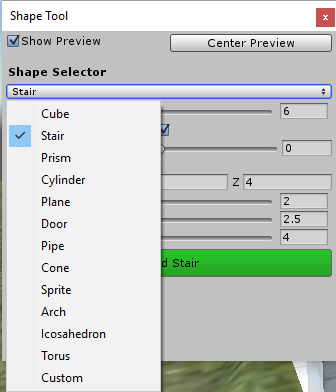
ProBuilder is available in two flavours. ProBuilder Basic is the free version with reduced functionality. ProBuilder Advanced offers the complete set of tools at 95$ per licence. As any other modeling tool, ProBuilder allows you to add different shapes to your scene, such as planes and cubes, but also stairs, arches, or custom objects. These can then be modified by moving vertices, edges, or faces, changing normals, or setting colors. The Advanced version adds things like subdividing and merging objects, extruding faces, smoothing and others.
House Prototyping
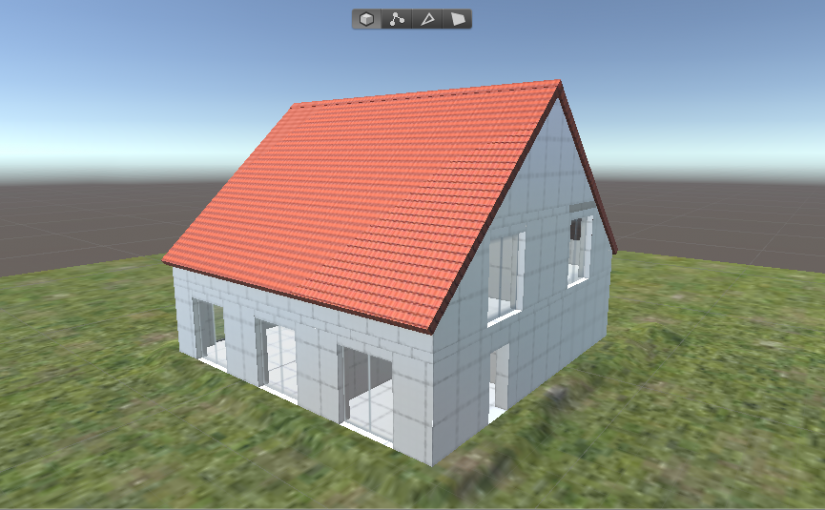
My goal was to quickly get an impression of how my floor plans might look like in 3D. The project setup had to be simple, and I was not very ambitious to write my own scripts for this experiment. Therefore, I just added a few standard asset packages (Characters, CrossPlatformInput, and Environment) to my new project and got started with modeling.
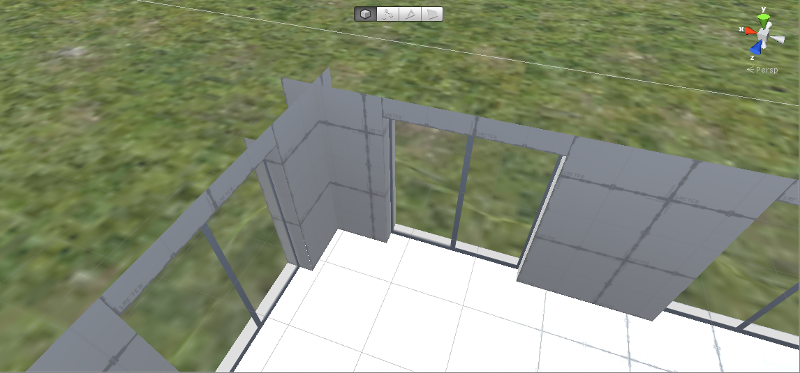
The basic layout of my house would be simply rectangular, so I added a plane with the right size via the ProBuilder shape tool. I won’t be able to look under this base plate, so it does not matter that it has no actual thickness. The walls, on the other hand, have a certain extent. Therefore, it is important to model them with the correct thickness. This would be around 40cm, so I built the walls from plane segments with a width of 2m and a height of 2.5m – one for the outer wall and one for the inner wall with a distance of 40cm (i.e., Unity units) in between.
The ground floor was done very quickly by copy-pasting the wall segments and rotating them around the Y axis if necessary. Since I would not want to live in a dark bunker, I then had to resize and shift the wall segments to leave space for the windows and doors. The segments are resized by moving the respective edges of the wall planes. This is done by selecting an edge and pulling the axis gizmo into the desired direction.
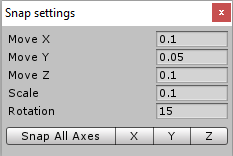
Hint: ProBuilder does not allow to change the size of a shape by typing in the actual size values. If you want to have well-defined object sizes, you should set the snap settings of Unity (from the Edit menu) to, e.g., 0.1. Now, pressing the Ctrl key while pulling an edge or face sets the size of the object to multiples of 10cm. Thus, the edges of the wall segments fit perfectly together.
ProBuilder provides a door shape, which is basically an opening in a wall with a lintel above. This can be used for the windows as well. For the window panes I added two planes facing in opposite directions and added my own custom texture. This shows a simple, white window frame, and is transparent otherwise. In order to get a transparent appearance, you need to set the rendering mode of the standard shader to “Transparent”.
The remainder was routine work. The ProBuilder stairs did not have the desired rectangular outer shape, so I had to shift a few faces there. Otherwise, the inner walls and ceilings are cubes with the right thickness, as well as the roof which I had to tilt in the right way. Finally, I modelled the ground around with a simple terrain.
Gamification
When the modelling is done you can look around your house within the editor. But of course you get a much better impression if you are able to move around your house as you would in reality. Therefore, I added a first-person controller from the Unity Characters standard asset package to the scene. Without any more modifications I can now enter my house in play mode and examine every room.
Additionally, I wanted to put my new virtual home onto my Android tablet. Here, I found out why ProBuilder Basic is mostly used for prototyping. On entering the building, graphics performance dropped quite badly, especially since my tablet is rather low-end. When I made sure that all objects were marked as static and reduced the quality settings I was finally able to smoothly navigate through my scene.
Conclusion
3D architecture design with Unity and ProBuilder is fun, but surely not the most efficient way to do it. A first layout is drafted quickly, especially if you build some prefabs from combined elements you use regularly. However, the more details you add, the more time-consuming it gets. My house is still lacking wall textures, roof and dormer windows, doors and not to mention furniture. But then, I only wanted to get a first impression, and that already works quite nicely.